This post was first published last year as the winter came to an end. But now it’s starting up again and I have got the lurgy good and proper. So instead of spending Sunday in my office, writing this week’s blog post and catching up on paperwork, I spent it in bed with no voice and a SPLITTING headache. But I did *think* about blog posts, and this is what I thought: I need to make some of those cold a flu remedies. I just used my last shower vapor disk last week, and my vapor rub is long gone. And I need some more. And some ginger tea. So, without further ado, here is how to make some cold & flu remedies to have on hand for the winter.
So it’s time to make a batch of DIY shower vapor disks, and some more home made chest rub too, since the last batch is mostly spread into a corner of the carpet (out of sight, luckily) thanks to Ms Three-Year-Old Charming-Menace. Oh well, it wasn’t strong enough anyway.
Read on for simple instructions to make both, or as of May 2023, download a printable for the shower disks from my VIP facebook group here (but still scroll down for the Vapor Rub instructions – though I do plan to make a printable for it as well, eventually).
Homemade Shower Vapor Disks
You will need:
1 cup bicarb (baking) soda (or a little more)
1/3 cup water
1 silicon muffin pan, or a metal muffin pan plus 6 patty pans (cupcake liners).
You can either use your oven, in which case preheat it to 120C (about 250F), or you can leave these to dry naturally for 12-18 hours.
Instructions
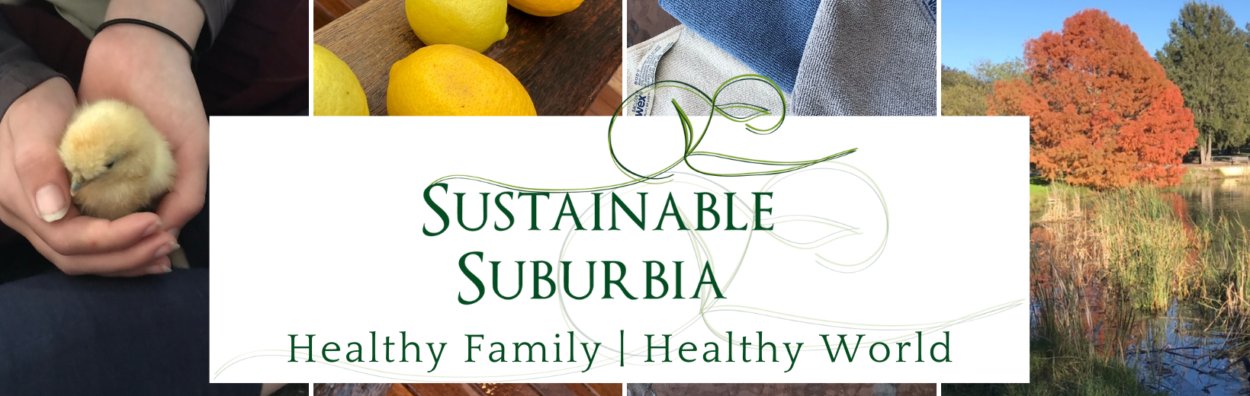
In a mixing bowl, mix 1 cup bicarb soda with the 1/3 cup of water. This is enough to make 6 disks. If you want to make more, just keep that ratio of about 3:1 and increase as much as you like.
This is so easy – and non-toxic – that you can get your three year old to do it for you (with supervision, of course!).
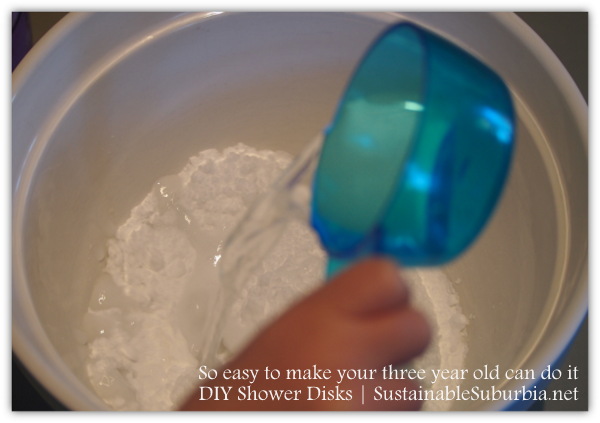
The consistency will be something like thick icing – a good thick paste. If it seems too runny, just add a little more bicarb. You can either add your essential oils now, or add them individually after they dry (which allows you to vary your oils). For this size batch, I would put in about 30 drops each of Eucalyptus and Peppermint, and 15 drops of Rosemary (which I don’t love as much).
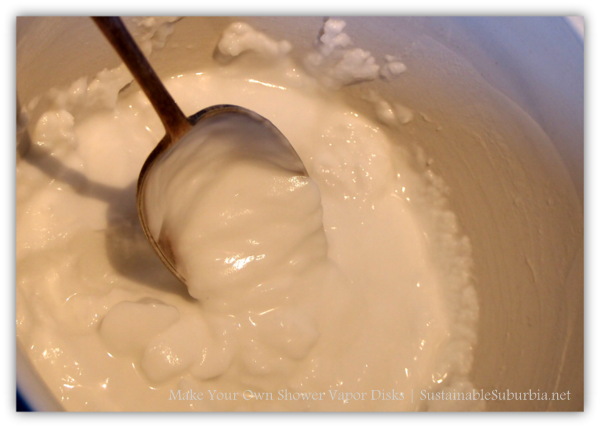
Spoon the bicarb mixture into your muffin tray (using liners if it’s a metal tray) and leave for a few minutes to settle down. They should end up looking nice and smooth like this:
(If you don’t have a three year old helping you, they will probably look even neater!) Now, you can either leave them in a warm, dry place, out of reach of little fingers, for 12-18 hours, or you can bake them at about 120C for an hour or more. When they’re done they should look something like this, and be really hard to your tapping finger:
Leave them to cool and then add your essential oils before carefully removing them from the muffin tray. There are lots of different combinations of essential oils you could choose, and you can also experiment with how strong you like it.
For this batch, I used four drops each of Eucalyptus and Rosemary oil, and eight drops of Peppermint oil, which can be quite strong, but has a lovely refreshing – and head clearing – scent. But mix it up and see what you like. (See cautions – not recommended for use with babies and toddlers.)
You can certainly make more than six at once, but keep in mind that the essential oils’ potency will reduce over time, especially if they are not kept in an opaque container. Of course, you can always add more oil just before your shower! Store in a sealed (ideally opaque) container.
To use, just drop them on the floor in the corner of your shower, and allow the steam to bring the oils up. Depending how long you shower for, you may have part of a disk left over, which you can allow to dry out and use another time.
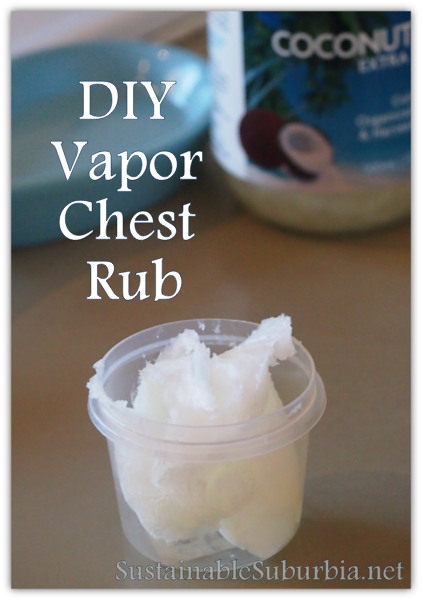
DIY Chest Rub for Colds and Flus
Having that steamy shower is great if you have a cold, but sometimes, especially when you are going to bed at night, you want something to rub on your chest.
For a small batch, you will need:
10g (about 1 tbsp) pure bees wax (you can grate a block of it, or use pellets, or just chop up a sheet you have on hand for making candles) *optional, see note below
60 g coconut oil (4 tbsp) (you can use olive or almond oil instead, if that’s what you have**)
2 tsp cacao butter (about 10g) (completely optional, but lovely – can be replaced with shea butter)
Fill a medium size saucepan with a couple of inches of water, and place on a medium heat on the stove. Stand the glass jar in it. (You can use a double boiler instead if you have one, but keep in mind wax is hard to clean out.)
Gently melt the oils and wax. The wax will take the longest.
Take off the heat, add your essential oils and stir well. You can also add 10 drops cinnamon, thyme or lavender oil.
Decant into a small container, and leave to solidify. If you store in an opaque container, the essential oils will remain effective for longer. Brown or blue glass is ideal.
Notes
Since you are sticking your fingers in this (and so are your kids, perhaps) I prefer to make small batches more often, rather than one big one. But this can be scaled up with no problem.
*The beeswax is optional with coconut oil, especially if you add cacao or shea butter, which are quite solid at room temperature. BUT it will help it feel more like a salve and less like just rubbing oil into your skin. A little less messy. Coconut oil will be more solid if you refridgate it, but will also then be cold to apply!
**If you use olive or almond oil, you will need the beeswax to make it solid.
Keep in mind that peppermint oil can be an irritant and both peppermint and rosemary EOs are sometimes listed as contraindicated during pregnancy and/or nursing and not recommended for use with very young children. Eucalyptus oil should also be avoided around babies. This is super important, as some essential oils can literally rob babies of breath, rather than clearing their airways. Think how a strong inhalation of peppermint might make you cough, and imagine it in a baby.
If you have any specific condition (eg epilepsy or high blood pressure) you should always do your own research and make an informed decision. “Experts” are divided, with some listing numerous oils as contraindicated for various issues, and others being more moderate. Consider working with a qualified aromatherapist who can give you personalised and professional advice.
Parent tip:Pure steam is a great remedy for coughs in babies and young children – just take them into the shower with you, or have them sit in a steamy bathroom.
What’s your favourite homemade cold & flu remedy?
Let us know in the comments!
Edited to add: I meant to say, I first heard about the shower disks from my lovely Osteopath, who printed out this recipe for me, from Sarah at Frugal By Choice. After testing a variety of different recipes, mine is a little different to Sarah’s, but none the less, credit where it’s due: I’d never even heard of them – even the shop bought variety, which were apparently only available for a short time – before Sarah posted that recipe.
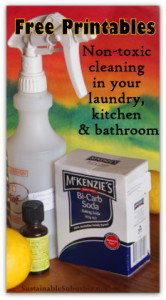
Would you like to save money and time, and get rid of the nasty toxins in your laundry?
Yes? Then sign up to get my Free Non-toxic Cleaning Printables, with my set of non-toxic cleaning recipes & tips for your laundry, kitchen & bathroom, including two pre-wash laundry stain removers. I have them on my laundry wall, but you may want to put them up in your pantry cupboard or even on the kitchen wall. When you sign up, you’ll get the printables, plus special subscriber only emails. So what are you waiting for? Go get ’em!
NB these printables are not about using Norwex. For more Norwex product instructions, just use the search bar at the top of this page!
18 thoughts on “How to Make Your Own Shower Disks & Vapor Rub”
Fantastic. I’ll take your word for it that it’s easy – my daughter has a sore throat and is a bit nasally – I will give it a go and let you know.
I forgot to say, if there’s some shower disk left at the end of the shower, you can also just leave it in there for the next person and/or a lovely peppermint smell in the bathroom for the rest of the day 🙂
This is fantastic- I love natural remedies (as I’ve mentioned many a time) and anything with coconut so these look wonderful, thank you for sharing! #teamIBOT
You’re welcome Twitchy 🙂
Wow that is awesome – I will share with my friend who LOVES natural remedies and has a sick boy right now!
Thanks Emily, I hope it helped her.
Love the idea of the home made chest rub! I hadn’t even thought of looking for a recipe for this. I will definitely give it a go. Thank you 🙂
Yeah, I love to be able to make my own, and to vary the strength (I like it a lot stronger than the kids!) and the oils, depending how I feel 🙂
Love this! I had never even heard of shower disks before. Definitely bookmarking this for next winter (it’s summer here and I’m just about to try making DIY sunscreen for the first time!)
Oh I hope the sunscreen goes well Karin. I haven’t tried making my own yet, unless just using coconut oil counts 🙂
DIY sunscreen recipe sounds like a great idea for summertime.
Hi, I look at the weblogs called DIY Cold & Flu Remedies, for those Change of Season Bugs (Shower Disks & Vapor Rub) on a
regular basis. Your story-informing fashion is awesome, keep up the best job!
And you will look our web site pertaining mattingfurniture.com.
Thank you! I’m sick with the lurgy right now and it’s driving me mental. I’m going to make a homemade chest rub with the coconut oil and essential oil I have on hand. I don’t have any bees wax or cacao butter, so I’ll just have to leave those out! x
That works! The essential oils will still do their job just as well 🙂
Hope you feel better quickly!
In the recipe for the Vicks vapor rub is it cacao butter or cocoa butter or is there a difference? Thanks!
Sorry I missed this Kristin. Cacao is just raw Cocoa. So you could use either, but cacao has many more nutrients in it, so I prefer it, generally.
Hi
Vitamin E is mention in the instructions, but I didn’t see it in the list of ingredients nor when to add in the directions to make the ‘chest rub’. Did I miss something?
Sorry Victoria, you are quite right! The vitamin E is a preservative, and not essential, depending how much you make and how quickly you will use it.
I just use a one or two capsules, pierce them open and add them at the same time as essential oils. I probably left it out of the final recipe because I make such a small amount of this at a time.
In 2010 Kirsten was on maternity leave with her third child, firmly established in suburbia, and needing an outlet for her passion for the environment & sustainable living. Thus Sustainable Suburbia was born.
In 2013 she took a redundancy from her public service job and completed her book, Less Toxic Living: How to Reduce Your Everyday Exposure to Toxic Chemicals, and made a PDF copy available for free download. By popular request she later created a kindle version (and it's available in paperback too).
In 2014 she joined with Norwex as an Independent Consultant, and found a new way to pursue her passion, teaching small groups of (mostly) women about how to get rid of many of the toxic chemicals in their homes.
In 2015 she discovered it could be even more rewarding to help other women pursue their goals, when she became a leader with Norwex.
In 2024 and beyond she plans to help even more people to ditch the nasty chemicals and find more sustainable ways to live.


Fantastic. I’ll take your word for it that it’s easy – my daughter has a sore throat and is a bit nasally – I will give it a go and let you know.
I forgot to say, if there’s some shower disk left at the end of the shower, you can also just leave it in there for the next person and/or a lovely peppermint smell in the bathroom for the rest of the day 🙂
This is fantastic- I love natural remedies (as I’ve mentioned many a time) and anything with coconut so these look wonderful, thank you for sharing! #teamIBOT
You’re welcome Twitchy 🙂
Wow that is awesome – I will share with my friend who LOVES natural remedies and has a sick boy right now!
Thanks Emily, I hope it helped her.
Love the idea of the home made chest rub! I hadn’t even thought of looking for a recipe for this. I will definitely give it a go. Thank you 🙂
Yeah, I love to be able to make my own, and to vary the strength (I like it a lot stronger than the kids!) and the oils, depending how I feel 🙂
Love this! I had never even heard of shower disks before. Definitely bookmarking this for next winter (it’s summer here and I’m just about to try making DIY sunscreen for the first time!)
Oh I hope the sunscreen goes well Karin. I haven’t tried making my own yet, unless just using coconut oil counts 🙂
DIY sunscreen recipe sounds like a great idea for summertime.
Hi, I look at the weblogs called DIY Cold & Flu Remedies, for those Change of Season Bugs (Shower Disks & Vapor Rub) on a
regular basis. Your story-informing fashion is awesome, keep up the best job!
And you will look our web site pertaining mattingfurniture.com.
Thank you! I’m sick with the lurgy right now and it’s driving me mental. I’m going to make a homemade chest rub with the coconut oil and essential oil I have on hand. I don’t have any bees wax or cacao butter, so I’ll just have to leave those out! x
That works! The essential oils will still do their job just as well 🙂
Hope you feel better quickly!
In the recipe for the Vicks vapor rub is it cacao butter or cocoa butter or is there a difference? Thanks!
Sorry I missed this Kristin. Cacao is just raw Cocoa. So you could use either, but cacao has many more nutrients in it, so I prefer it, generally.
Hi
Vitamin E is mention in the instructions, but I didn’t see it in the list of ingredients nor when to add in the directions to make the ‘chest rub’. Did I miss something?
Sorry Victoria, you are quite right! The vitamin E is a preservative, and not essential, depending how much you make and how quickly you will use it.
I just use a one or two capsules, pierce them open and add them at the same time as essential oils. I probably left it out of the final recipe because I make such a small amount of this at a time.