 Digging up fresh, earthy potatoes reminds me of hunting for Easter eggs as a child. The whole process of learning how to grow potatoes from start to finish is exciting really.
Maybe because they are not the typical seed but rather a sprouting tuber that can be planted whole or cut apart. Maybe because they have eyes and like living in the dark rather than the light.
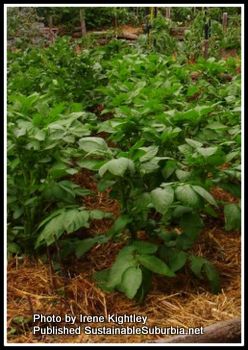
Whatever the appeal, you can grow potatoes in a variety of mediums – beds, bags, rubbish bins, wire enclosures or layered under mulch for a “no dig” potato harvest. Potatoes do not require much ongoing maintenance and can be enjoyed throughout the year in myriad ways – baked, scalloped, fried, or roasted to name just a few.
And despite their renowned presence in dishes from breakfast through to supper, they can also contribute to some fabulous desserts!
Selecting a site in the garden
If there is space in your garden, select a site where tomatoes, eggplant or peppers have not grown for the past two years to decrease the chance of spreading soil-borne disease. The soil should be free draining to keep the potatoes from rotting and have a slightly acidic pH. The site should receive about six hours of sunlight per day.
Preparing to plant
Be sure to choose certified seed potatoes to plant. For an early start to your potato season, you will want to “chit” them. “Chitting” is simply laying out the seed potatoes in a flat box (egg cartons work great) in a single layer and placing them in a cool, dry place for 1-2 weeks to allow the eyes to sprout. Mid and late season varieties do not require “chitting”.
If the seed potatoes are small, you can plant them whole. Otherwise, very large seed potatoes can be cut up so that each piece has two to three eyes on it. Allow them to dry for at least two days so that the cut sides dry over to prevent rotting.
Planting
There are a few different ways to plant potatoes depending on your preference as well as available space.
Planting in trenches – To plant potatoes in trenches, dig the trench 15-20cm deep and place potatoes eye side up 30cm apart. Cover with 10cm of soil.
Planting in individual holes – Dig a hole 15-20cm deep, place the potato eye side up into the hole. Cover with 10cm of soil.
 Planting in a container or bag
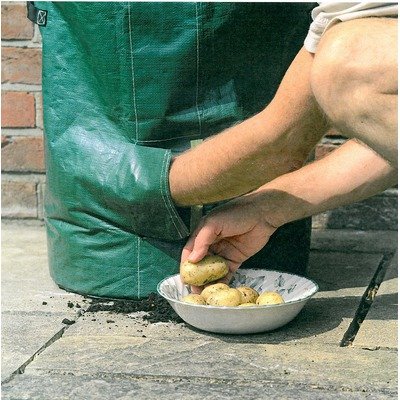
If you want to grow your own potatoes but have limited space, planting potatoes in a bag or container is a fabulous option.
There are specific potato growing bags available for purchase or there are a variety of other containers that make suitable growing mediums. I like to use old feed bags. Any sturdy container will work well.
Fill the bag 1/3 full with healthy compost and place the potatoes on top of the compost. Add another layer of compost and plant two additional seed potatoes before filling the bag with compost.
Planting “no dig” potatoes
“No dig” potatoes can be planted above ground but it is important to note that they are more frost sensitive than potatoes underground, so care should be taken if frosts are forecast by covering the area well with blankets, newspapers or straw.
In the selected space, clear the ground of weeds (mowing at a low level is fine). If the ground is particularly dry, water well. Spread two barrows of compost over 10 sq meters. Lay the potatoes on top of the compost using the spacing indicated for other planting methods above. Cover with straw.
Care
Water weekly and as the potatoes begin to push upward, continue to mound the soil over them leaving about 10cm of foliage protruding each time. This process is called “hilling” and prevents the potato from being exposed to light, which turns it green and poisonous.
If trying the “no dig” method, continue covering the potatoes with mulch as above and when the mulch reaches a depth of 15cm and the green foliage is growing well, cover the mulch with a thick layer of grass clippings to keep out any light.
Harvesting
When to harvest a potato will depend on the growing season and what size of potato you want.
Main crop varieties are usually harvested after the foliage begins to wither and yellow. Get ready to start digging approximately ten days after the tops die back. Use a fork to gently lift the soil, starting at the outer edge of the hill or trough. Make sure to dig deep enough to get all of the potatoes.
With the “no dig” method, simply lift back the mulch, remove the potatoes needed and recover with mulch.
Storing
If you are not eating the potatoes right away, leave them in a single layer in a box with plenty of ventilation. Do not wash them and keep them in a dark, cool space.
Seed Saving
You can save seed potatoes from your harvest to plant the following year. Set aside the healthiest potatoes in a cool, dry place.
By choosing the best of the crop and saving them each year for planting in subsequent years, you will develop a potato that is especially suited to the specific conditions of your garden.


